
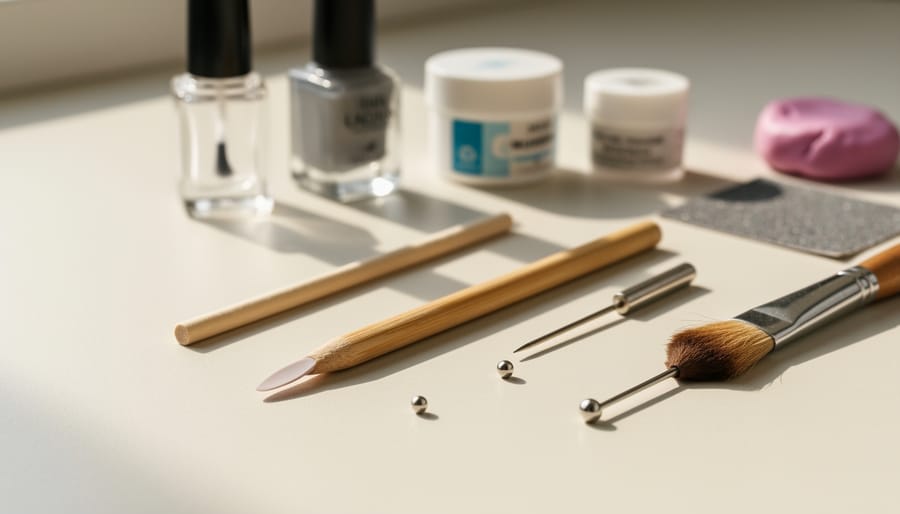
Transform everyday materials like wooden dowels, polymer clay, and old makeup brushes into professional-quality nail tools that rival store-bought versions. Start by repurposing a wooden cuticle pusher from a bamboo skewer filed to a rounded edge, then seal it with clear nail polish for longevity. Create custom dotting tools by fixing ball-head pins of varying sizes into old pen caps with strong adhesive, giving you precise control for intricate nail art at a fraction of retail costs.
Your nail care toolkit deserves the same creative attention you give to DIY beauty products. Whether you’re a nail art enthusiast working with limited resources or simply love the satisfaction of crafting personalized tools, making your own implements opens up endless possibilities for self-expression. The beauty of DIY nail tools lies not just in cost savings, but in the empowerment that comes from designing equipment that works perfectly for your unique needs and aesthetic.
This comprehensive guide walks you through creating essential nail care tools using accessible materials you likely already have at home. From shaping implements to application tools, you’ll discover how simple household items can be transformed into professional-grade equipment. We’ll explore safe material choices, proper construction techniques, and creative customization options that let your personality shine through every tool you make. Get ready to revolutionize your nail care routine while celebrating the resourceful, creative spirit that makes your beauty journey uniquely yours.
Why DIY Nail Tools Are Having Their Moment
There’s something magical happening in beauty right now, and it’s all about taking control of your self-care routine in the most personal way possible. The DIY nail tool movement isn’t just a passing trend—it’s a full-blown celebration of creativity, individuality, and smart beauty choices that align with who we really are.
Let’s talk about the elephant in the room: professional nail tool kits can easily set you back $150 to $300, and that’s before you even consider replacement items. Creating your own handcrafted beauty tools flips this script entirely.
These savings mean more budget for that amazing new polish collection you’ve been eyeing, or perhaps investing in other aspects of your beauty journey.
Beyond the financial freedom, there’s something deeply satisfying about crafting tools that fit your hands perfectly and match your unique aesthetic. Whether you’re personalizing handles with your favorite colors or adjusting file sizes to suit your natural nail shape, DIY tools become extensions of your creative expression. They tell your story.
The sustainability angle resonates powerfully too. Instead of contributing to the cycle of disposable beauty products, you’re creating durable implements from thoughtfully chosen materials—often repurposing items that might otherwise end up in landfills. This conscious approach to beauty feels authentic and empowering, especially for those of us committed to making more environmentally responsible choices.
Most importantly, crafting your own tools transforms your manicure routine from a simple maintenance task into a moment of genuine self-care and accomplishment.
Essential Materials Every DIY Nail Tool Creator Needs
Creating your own nail tools is an empowering journey that transforms your home beauty studio into a personalized sanctuary. Let’s explore the essential materials that’ll help you craft professional-quality tools while expressing your unique style.
Start with your foundation materials. Wooden cuticle sticks are incredibly versatile and affordable—look for birchwood or orangewood at craft stores like Michaels or online through Amazon. These naturally antibacterial woods shape beautifully and feel gentle against your nails. For silicone components, visit specialty suppliers like Smooth-On or Reynolds Advanced Materials. Food-grade silicone works perfectly for creating custom nail art tools and dotting implements.
Metal materials deserve special attention. Stainless steel wire (available at jewelry supply stores like Rio Grande) won’t rust and maintains its shape brilliantly. Consider surgical-grade stainless steel for implements that touch your skin—it’s worth the investment for safety and longevity. Hobby Lobby and hardware stores carry aluminum rods that are lightweight yet sturdy for handle cores.
Handle materials let your creativity shine. Polymer clay from brands like Sculpey allows endless color possibilities and comfortable grips. Resin casting (try ArtResin or similar products) creates gorgeous translucent handles with embedded glitter or dried flowers. Wood dowels from craft stores provide classic, sustainable options that you can sand smooth and customize.
Don’t overlook your adhesives and finishes. E6000 industrial-strength adhesive bonds virtually anything, while two-part epoxy ensures permanent holds. Food-safe sealants protect wooden tools, and clear nail polish works surprisingly well for quick finishes.
Quality sandpaper in various grits (80 to 2000), small files, and buffing cloths complete your toolkit. Etsy and specialty crafting sites often bundle these supplies affordably. Remember, investing in quality materials means creating tools that celebrate your beauty journey for years to come.
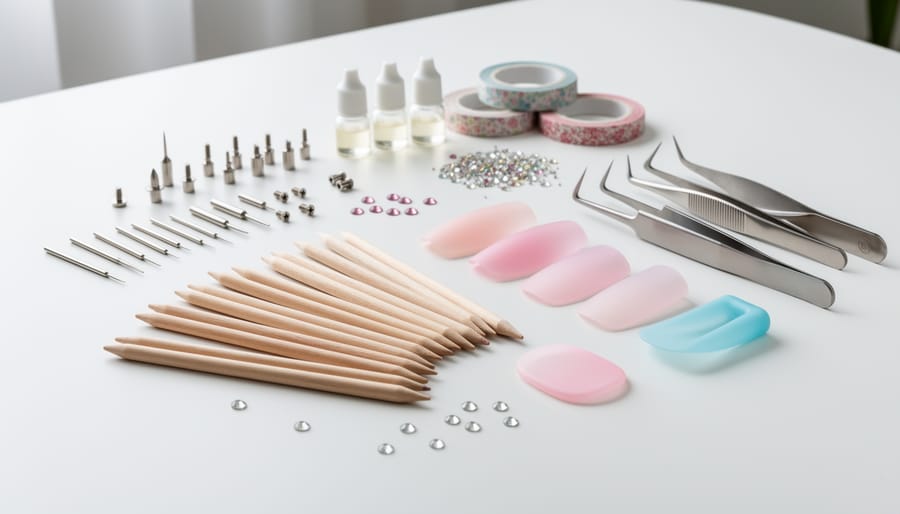
Custom Cuticle Pushers and Trimmers
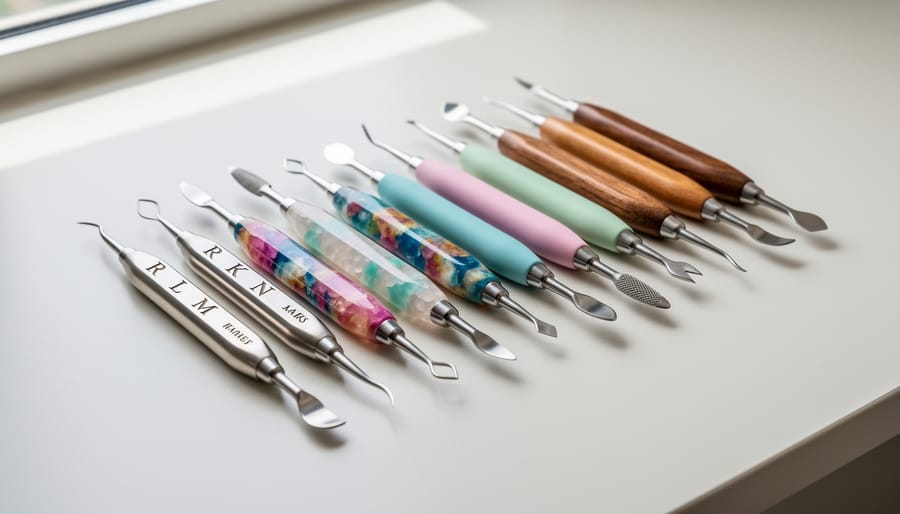
Wooden vs. Silicone: Choosing Your Base
Choosing between wooden and silicone bases is like picking between a classic trench coat and a sleek vinyl jacket—both are fabulous, just serving different vibes in your DIY nail tool journey.
Wooden bases bring that natural, sustainable energy we’re all craving. They’re sturdy, easy to sand into custom shapes, and perfect for tools like cuticle pushers and nail buffers. The texture gives you excellent grip control, especially when your hands get a bit product-happy during your nail sessions. To work with wood, start with softer varieties like birch or bamboo. Sand smoothly to avoid splinters, and seal with food-safe oil for longevity. Wood works beautifully when you want tools with that artisanal, personalized touch that tells your unique story.
Silicone, on the other hand, is your modern multitasker. It’s flexible, heat-resistant, and ridiculously easy to clean—total game-changer for stamping tools and mixing palettes. Silicone molds let you create custom shapes by pouring and setting, making it ideal for ergonomic designs that fit your hand perfectly. It’s also hypoallergenic, celebrating every skin type without judgment.
Consider your project’s purpose: wooden tools excel for precision work, while silicone shines in versatility and comfort. Mix both materials in your collection to embrace the full spectrum of your creative possibilities.
Making Them Uniquely Yours
The beauty of creating your own nail tools lies in making them truly yours! Just like personalized beauty rituals that celebrate your individuality, customizing your tools transforms them from simple implements into extensions of your personal style.
Start with decorative wrapping using washi tape, colorful embroidery floss, or even fabric scraps that match your aesthetic. Whether you’re drawn to minimalist neutrals or bold geometric patterns, these wrappings add grip while showcasing your personality. Color customization goes beyond surface decoration too. Consider painting wooden handles with nail polish in your signature shades or using acrylic paints for more intricate designs.
For those who love a permanent touch, wood-burning tools allow you to engrave initials, meaningful symbols, or inspiring mantras directly onto handles. This creates heirloom-quality pieces that tell your story.
Don’t overlook ergonomics in your personalization journey. Our hands are beautifully diverse, so adjust handle thickness using foam grips or polymer clay molding to fit your unique grip. Smaller hands might benefit from slimmer profiles, while those with arthritis or joint concerns can build up handles for easier manipulation. Remember, the best tool is one that feels like it was made just for you, because it was.
DIY Nail Art Tools That Rival Professional Kits
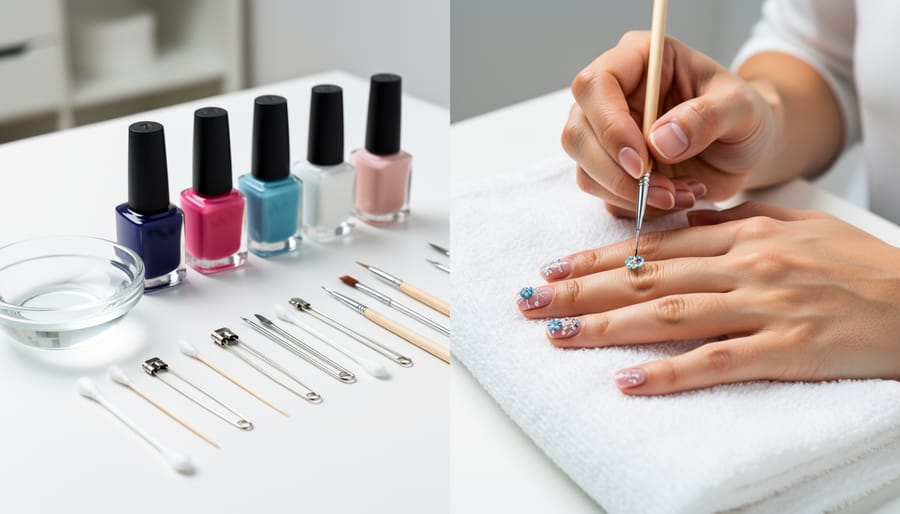
Dotting Tools from Bobby Pins and Beads
Creating your own dotting tools is one of the most satisfying DIY nail art projects, and you probably have everything you need already lying around your home. The magic combination? Bobby pins and beads in various sizes. This is where your creativity gets to shine while saving money in the process.
Start by gathering straight bobby pins (the flat ones work best) and beads with holes that fit snugly on the pin ends. Glass beads, wooden beads, or even plastic craft beads all work beautifully. Simply slide a bead onto one end of the bobby pin, making sure it’s secure. For extra stability, add a tiny drop of super glue to keep your bead in place. Let it dry completely before use.
The beauty of this approach is customization. Small seed beads create delicate micro-dots perfect for intricate designs, while larger beads give you bold statement dots. Make a whole set in graduating sizes to expand your nail art possibilities. Keep them organized in a small container, and you’ve got professional-looking results without the professional price tag.
Custom Brush Creation for Intricate Designs
Creating your own custom brushes opens up a world of possibility for achieving those jaw-dropping, intricate nail art designs you’ve been dreaming about. Start by selecting high-quality synthetic fibers, which offer excellent precision and are perfect for detailed work like delicate florals or geometric patterns. The beauty of making your own tools is that you get to choose exactly how fine or thick you want each brush based on your unique artistic vision.
To assemble your brush, carefully gather your chosen fibers and secure them tightly with thread or thin wire before inserting them into a comfortable handle. You can repurpose old makeup brush handles or find wooden dowels at craft stores to create something that feels just right in your hand. This personalization means less hand fatigue during those extended creative sessions.
Maintaining your brushes is where the magic continues. After each use, gently clean them with brush cleaner or mild soap, reshape the bristles while damp, and lay flat to dry. This simple ritual keeps your custom tools performing beautifully, empowering you to create salon-worthy designs right at home.
Stamping Tools on a Budget
You don’t need expensive stamping plates and scrapers to create gorgeous nail art patterns. With a little creativity, you can craft your own stamping tools that work beautifully. Start by cutting a makeup sponge or silicone baking mat into small squares for DIY stampers. The slightly tacky surface picks up polish designs perfectly. For scrapers, repurpose old gift cards or credit cards by smoothing the edges with fine sandpaper. These makeshift tools transfer intricate patterns just as effectively as store-bought versions.
Want to get even more inventive? Try using rubber erasers as mini stampers for smaller designs, or cut kitchen shelf liner into custom shapes. The key is experimenting with different textures until you find what works for your technique. This resourceful approach not only saves money but also celebrates your unique problem-solving spirit. Remember, some of the most stunning nail looks come from thinking outside the beauty supply box and embracing what you already have at home.
Filing and Shaping Tools You Can Make Yourself
Creating your own filing and shaping tools is such an empowering way to customize your nail care routine exactly how you want it. You deserve tools that work perfectly for your unique needs, and making them yourself means you control everything from the grit level to how they feel in your hand.
Start with a basic nail file by cutting a wooden craft stick or popsicle stick to your preferred length. Using spray adhesive, attach sandpaper or emery paper in your chosen grit. For everyday shaping, 180-grit works beautifully, while 240-grit is perfect for gentle smoothing. The magic here is that you can keep the wooden base and simply replace the sandpaper when it wears out, making this an eco-friendly choice that keeps giving.
Want a professional-style buffing block? Cut a piece of dense foam or a clean kitchen sponge into a rectangular shape that fits comfortably in your palm. Attach different grits to each side using double-sided tape or craft glue. Try 400-grit for smoothing ridges, 1200-grit for a silky finish, and finish with 3000-grit for that enviable high-shine look. This multi-sided approach means you have everything you need in one handy tool.
For those of you with longer nails or specific shaping preferences, craft sticks with curved edges give you more control than standard files. Sand down one end of a wooden stick into your ideal curve, then apply your chosen grit. This is your canvas to create something truly personal.
The best part? You can decorate these tools with washi tape, paint, or stickers that reflect your personality. Your nail care routine becomes a celebration of who you are, with tools as unique and beautiful as your style.
Safety First: Sanitizing and Maintaining Your Creations
Let’s talk about something absolutely essential, beautiful people: keeping your custom nail tools safe and sanitary. Creating your own tools is empowering, but maintaining them properly ensures every manicure moment stays healthy and fabulous.
Before each use, sanitize your DIY tools just like the professionals do. Metal implements should be cleaned with rubbing alcohol (70% isopropyl minimum) or submerged in a hospital-grade disinfectant solution for at least 10 minutes. For wooden tools like orange sticks, consider them single-use or reserve them for your personal collection only, since porous materials harbor bacteria. Plastic and silicone tools benefit from gentle soap washing followed by an alcohol wipe-down.
Storage matters tremendously for longevity and hygiene. Keep your creations in a clean, dry container, separate from makeup and other beauty products. A dedicated cosmetic bag with compartments or a small toolbox works wonderfully. Label everything clearly so you remember what each tool does, especially if you’ve gotten creative with your designs.
Here’s the real talk about replacement: inspect your tools regularly for wear and tear. Rough edges, rust spots, or cracked handles mean it’s time to retire that piece. Metal tools typically last years with proper care, while DIY wooden or cardboard implements should be replaced monthly or whenever they show deterioration.
Your safety is never negotiable. If something feels wrong or causes discomfort during use, trust your instincts and set it aside. This journey is about celebrating your creativity while protecting your wellbeing. You deserve tools that work beautifully and keep you healthy, always.
Troubleshooting Common DIY Nail Tool Issues
Creating your own nail tools is such an empowering journey, but let’s be real – sometimes things don’t go exactly as planned. The good news? Most issues have simple fixes that’ll have you back on track in no time.
If your tools feel flimsy or break easily, the problem often lies in material thickness. When working with wood or bamboo, opt for pieces at least 3-4mm thick for durability. For metal tools, ensure you’re using quality stainless steel rather than cheap alternatives that bend or rust. A quick pro tip: applying a clear nail strengthener or food-safe sealant to wooden tools adds an extra protective layer that makes them last so much longer.
Uneven surfaces are probably the most frustrating issue, especially when you’re trying to achieve that salon-worthy finish. Invest in various grits of sandpaper (start with 120-grit and work up to 600-grit for ultra-smooth results). Sand in consistent, one-directional strokes, checking your progress frequently by running your fingertip along the surface. Your sense of touch is honestly your best quality control tool.
Material splitting typically happens when you apply too much pressure during shaping or drilling. The solution? Pre-drill smaller pilot holes before making larger ones, and always support your material from underneath while working. This simple adjustment prevents those heartbreaking cracks that send your project back to square one.
Why do my tool handles feel uncomfortable after a few uses?
Handles need proper contouring to match your grip naturally. Sand edges into rounded shapes and consider wrapping them with thin cork tape or washi tape for added comfort and personalization.
How can I achieve a professional-looking finish on homemade tools?
The secret is patience with progressive sanding, finishing with 600-grit or higher sandpaper, then applying multiple thin coats of sealant rather than one thick coat. Allow each layer to dry completely between applications.
My metal tools have rough edges – how do I smooth them safely?
Use a metal file first to remove major roughness, then finish with fine-grit wet sandpaper. Always file away from your body and wear protective gloves during this process.
For uncomfortable grips, remember that ergonomics aren’t one-size-fits-all. Shape your handles to fit your unique hand size and grip style. Adding texture through light etching or wrapped materials like cotton cord can make holding your tools feel natural and secure, transforming your DIY creations into extensions of your own creative vision.
Turning Your Hobby Into Handmade Gifts
Your beautifully crafted nail tools deserve to shine beyond your personal collection. Transforming them into thoughtful gifts is a gorgeous way to share your creativity while celebrating the artisanal beauty movement with the people you love.
Start by curating themed sets that tell a story. A “Self-Care Sunday” collection might include a marbled cuticle pusher, rose-gold dotting tool, and lavender-scented nail buffer wrapped in soft tissue paper. For your friend who’s always jet-setting, create a compact travel kit with mini tools in a personalized pouch. Consider color-coordinating tools to match your recipient’s aesthetic—think moody burgundies for your edgy bestie or soft pastels for someone with romantic vibes.
Presentation transforms handmade into extraordinary. Use small glass jars, vintage tins, or sustainable bamboo boxes as packaging. Add personal touches like hand-lettered labels, pressed flowers, or a custom care card explaining each tool’s purpose. Tie everything together with natural twine or silk ribbon that reflects your recipient’s style.
Don’t forget the power of storytelling. Include a small note sharing why you created this particular set for them—maybe that blue swirl pattern reminded you of your beach trips together. These meaningful details elevate your gift from functional to unforgettable, proving that the most empowering beauty rituals are the ones we share.
Creating your own nail tools is more than just a budget-friendly beauty hack—it’s a celebration of your unique style and a powerful act of self-expression. Throughout this journey, you’ve discovered that personalized nail care doesn’t require expensive equipment or professional training. What matters most is your willingness to experiment, learn, and embrace the creative process.
Your DIY nail tools tell a story that’s entirely yours. Whether you’re crafting a dotting tool from household items or designing a custom nail file that perfectly suits your needs, you’re taking control of your beauty routine in the most empowering way. Every creation reflects your individuality, your resourcefulness, and your commitment to self-care on your own terms.
Now it’s your turn to dive in. Start small, be patient with yourself, and remember that every expert was once a beginner. Gather those materials, trust your instincts, and let your creativity guide you. The beauty community thrives on diversity and innovation, and your unique approach adds to that vibrant tapestry. Your perfect nail tool is waiting to be created—by you.
You may also like
-
This Bold Fragrance Trend Takes Vape Culture Straight to Your Vanity
-
This Parisian-Inspired Beauty Bakery Is Creating Edible Art for Your Skin
-
Transform Your Skincare with Nature’s Secret: Homemade Fermented Beauty
-
How Estheticians Transform Beauty Into Art: The Rise of Artisanal Beauty Crafts
-
Ancient Beauty Secrets That Define Our Cultural Legacy