
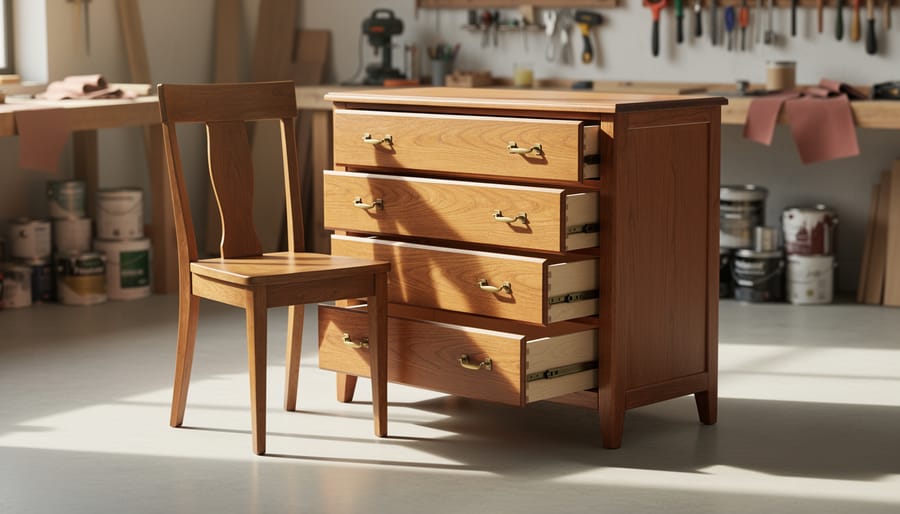
Starting a furniture upcycling business transforms discarded chairs, dressers, and tables into profitable, one-of-a-kind pieces through creative refinishing techniques like painting, reupholstering, and hardware replacement. The process requires minimal startup capital (typically $500-$1,500 for basic tools and initial inventory), takes 4-12 hours per piece depending on complexity, and can generate profit margins of 200-400% when you source smartly and develop your signature aesthetic.
This creative enterprise sits at the perfect intersection of sustainable living and personal style expression. While fashion has long been a canvas for showcasing your unique vision, furniture upcycling extends that same creative energy into your living space and transforms it into a viable income stream. The secondhand furniture market continues to grow as conscious consumers actively seek alternatives to mass-produced home goods, creating real opportunity for entrepreneurs who can spot potential in overlooked pieces.
What makes furniture upcycling particularly compelling as a business venture in 2026 is the low barrier to entry combined with genuine demand. You’re not competing with fast furniture giants on their terms. Instead, you’re offering something they can’t: character, craftsmanship, and the story behind each transformation. Your customers aren’t just buying a nightstand; they’re investing in a piece that reflects their values and aesthetic sensibility.
Success in this space depends on three core elements: developing an eye for pieces with good bones, mastering reliable refinishing techniques that stand up to daily use, and building a brand identity that resonates with your ideal buyers. Whether you’re envisioning a weekend side hustle or a full-scale studio operation, the fundamentals remain the same. This guide walks you through the complete process, from sourcing your first pieces and setting up your workspace to pricing strategically and marketing your finished creations to customers who value sustainable craftsmanship.
Why Furniture Upcycling Is Your Gateway to Creative Entrepreneurship
Furniture upcycling sits at the sweet spot where creativity meets commerce, and you don’t need thousands of dollars or a business degree to get started. Unlike traditional retail ventures that demand hefty inventory investments, you can launch an upcycling business with basic tools, a small workspace, and pieces sourced for under fifty dollars. The barrier to entry is refreshingly low, which means your biggest investment is time and imagination rather than capital.
The market timing couldn’t be better. Consumers in 2026 are actively seeking alternatives to fast furniture and disposable décor, mirroring the shift we’ve seen in fashion toward sustainable sourcing and conscious consumption. Repair and upcycling programs have gone mainstream, reshaping how people think about ownership and longevity. When someone buys your transformed vintage dresser, they’re not just purchasing furniture. They’re making a statement about values, investing in a one-of-a-kind piece that no one else will have.
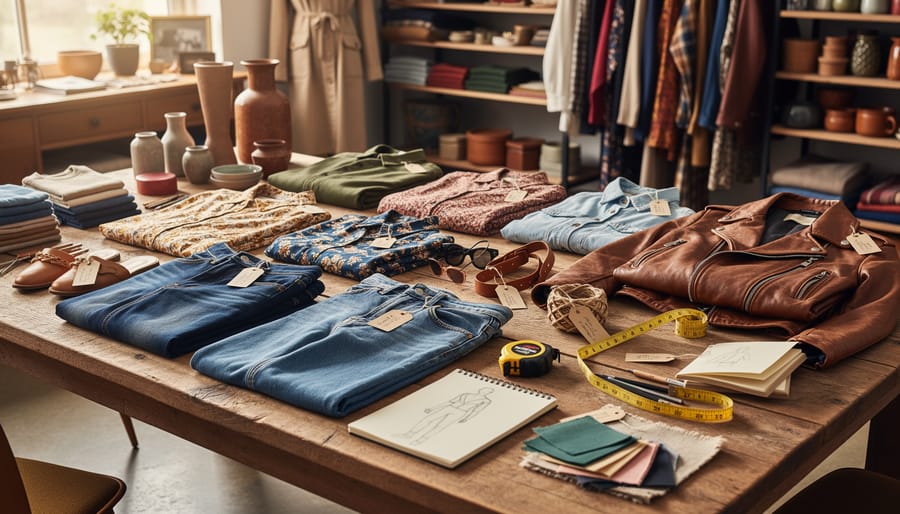
Here’s where your fashion sensibility becomes your competitive edge. The same eye that helps you spot an outfit with potential translates directly to identifying furniture pieces that can be transformed. You understand color stories, texture combinations, and how to create visual impact. That mid-century sideboard isn’t just old wood; it’s a canvas for jewel tones and brass hardware that could anchor someone’s entire living room aesthetic. You’re not competing with IKEA or Wayfair. You’re offering curated, expressive pieces that help customers extend their personal style beyond their closet.
The intersection of home and fashion has never been more fluid, and upcycling positions you right at that crossroads. Your customers are the same women who thrift designer jackets and mix vintage finds with contemporary pieces. They get it, and they’re ready to invest in furniture that tells a story.
What You’ll Need to Launch Your Upcycling Business
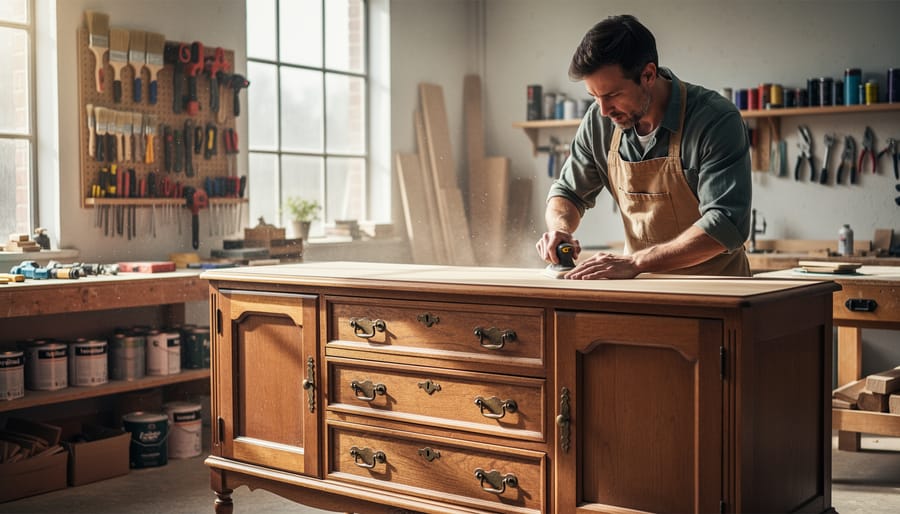
Starting your furniture upcycling business doesn’t require a massive initial investment, but you do need the right essentials to transform pieces with confidence. Think of this as building your creative toolkit, one that grows alongside your skills and style.
Your workspace comes first. You’ll need a dedicated area with good ventilation, adequate lighting, and enough room to move around furniture comfortably. A garage, basement corner, or covered outdoor space works perfectly for beginners. Don’t stress about having a Pinterest-worthy studio right away, functionality beats aesthetics when you’re starting out.
Here’s what you’ll actually need to launch, broken down by category with realistic budget estimates:
- Basic hand tools ($100-150): Screwdrivers, hammer, pliers, tape measure, putty knife, sanding blocks, and a quality paintbrush set
- Power tools ($150-300): Electric sander, drill with bits, and optional jigsaw for more advanced projects
- Paint and finishing supplies ($75-125): Primer, paint in versatile colors, clear sealant or wax, brushes and rollers, paint trays
- Surface prep materials ($50-75): Sandpaper in various grits, wood filler, TSP cleaner or degreaser, tack cloths, painters tape
- Safety equipment ($40-60): Respirator mask, safety glasses, work gloves, ear protection, dust sheets
- Hardware and accents ($50-100): Assorted drawer pulls, knobs, hinges, decorative trim pieces, upholstery tacks
- Fabric and upholstery basics ($75-150): Foam padding, batting, staple gun with staples, upholstery fabric in trend-forward patterns
Your total startup investment typically ranges from $500 to $1,000, though you can start leaner by borrowing tools or buying secondhand equipment. Many successful upcyclers begin with just the basics and add specialty items as they tackle more complex projects.
For sourcing furniture, cast a wide net. Thrift stores, estate sales, Facebook Marketplace, and Craigslist offer endless possibilities. Start with smaller pieces like side tables or chairs, they’re easier to transport, quicker to complete, and perfect for building your portfolio. Look for solid wood construction with good bones; surface damage is fixable, but structural issues rarely are.
Keep a small emergency fund of around $100 for unexpected supplies or that perfect piece you stumble upon. The beauty of this business is that your inventory essentially pays for itself once you start selling, creating a sustainable cycle of sourcing, transforming, and profiting.
Safety First: What to Know Before You Start Transforming Furniture
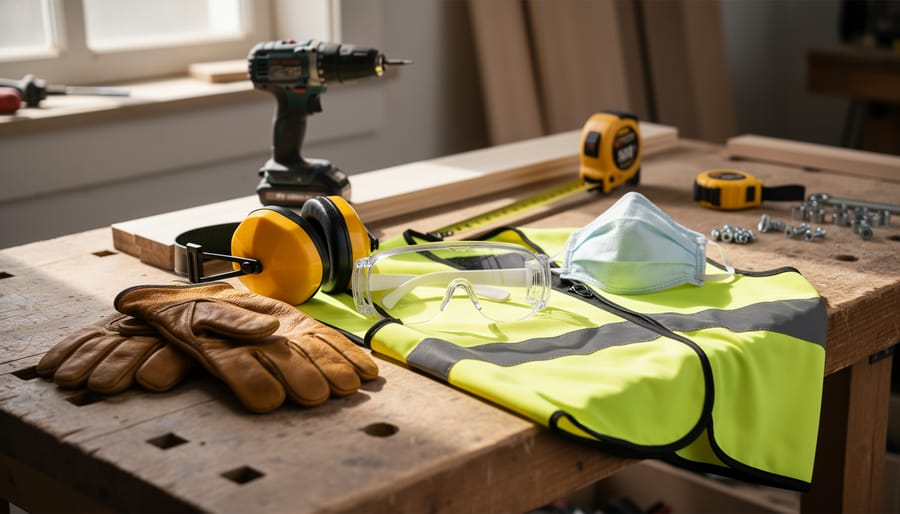
Before you dive into transforming that vintage dresser, let’s talk about keeping yourself safe while you create. Your creative vision deserves protection that’s as smart as your style, and a few precautions now prevent serious problems later.
Your workspace needs proper airflow, especially when you’re using strippers, solvents, or spray paints. Open windows aren’t enough, you need cross-ventilation with fans positioned to pull fumes away from your breathing zone. If you’re working with chemical strippers or oil-based products, proper exhaust ventilation for solvents becomes essential. Work outdoors when possible, or invest in a quality respirator rated for organic vapors, not just a basic dust mask.
Speaking of dust masks, let’s upgrade your protective gear. You’ll want safety glasses that fit snugly (flying wood chips aren’t fashionable), heavy-duty gloves for chemical work, and a proper respirator for sanding and stripping. Keep old clothes or a dedicated work apron to protect your skin from splashes and dust.
When sanding, always sand with the grain to avoid scratching, and keep your workspace dust-controlled with a shop vacuum equipped with a HEPA filter. Never sand in enclosed spaces without proper ventilation and respiratory protection.
Your back matters as much as your lungs. Lift furniture with your legs, not your back, and ask for help with heavy pieces. Position your work at comfortable heights to avoid hunching, your posture during a long refinishing session affects how you feel the next day. This kind of smart shopping green approach extends to how you treat your body while creating sustainable pieces.
Keep a first aid kit nearby, store chemicals in clearly labeled containers away from heat sources, and never mix different chemical products without checking compatibility. Your creative space should feel inspiring and safe, setting you up for long-term success in your upcycling journey.
Your Step-by-Step Process to Upcycle Furniture Like a Pro
Step 1: Source and Select Your Pieces
Tokens used: ~2800 / 200000 budget (~1.4% consumed)
—
Start at thrift stores and estate sales, they’re goldmines for solid wood pieces that just need vision. Check Facebook Marketplace and Craigslist weekly; set alerts for keywords like “vintage,” “mid-century,” or “solid wood.” Don’t sleep on curbside finds, either. That dresser someone’s tossing might just need new hardware and a bold paint job to become your bestseller.
Look for pieces with good bones. Run your hand along joints to check they’re tight, not wobbly. Open drawers, they should glide smoothly. Avoid particle board unless it’s just for practice; solid wood and quality plywood hold paint better and command higher prices. Surface damage like scratches or outdated finishes? That’s fixable. Structural issues like broken legs or water-damaged frames? Usually not worth your time unless you’re experienced.
Think profit margin from the start. Calculate what you’ll pay for the piece, plus your materials and time, against what similar upcycled furniture sells for in your area. A $30 dresser that needs $40 in supplies and six hours of work should realistically sell for $200+ to make business sense. Unique shapes, interesting hardware, or trendy styles give you more pricing power.
Step 2: Clean and Assess the Piece
Once you’ve brought your piece home, give it a thorough cleaning before you fall too hard for its potential. Start with a vacuum to remove loose dirt and debris from crevices, then wipe down all surfaces with a mixture of warm water and mild dish soap. For stubborn grime or sticky residue, try a paste of baking soda and water, it’s gentle yet effective on most finishes.
While you clean, assess the damage honestly. Loose joints, surface scratches, and missing hardware are totally fixable and actually add character to your final piece. Water rings, minor veneer chips, and dated hardware? Those are opportunities, not obstacles.
However, some issues are deal-breakers. Active wood rot that crumbles when you press it, severe structural instability that wobbles dangerously, extensive water damage with warping, or pervasive mold growth means it’s time to move on. Your creative vision deserves a solid foundation, literally.
Step 3: Prep Your Surface
Surface prep is where amateur work parts ways from pieces that command premium prices. Think of it as the primer before foundation, skip it, and everything that follows won’t sit right.
Start by sanding all surfaces with 120-grit sandpaper, working in the direction of the wood grain. You’re not stripping down to bare wood unless necessary; you’re creating texture for paint to grip. Switch to 220-grit for a smooth finish, then wipe away every speck of dust with a tack cloth.
Filling imperfections comes next. Wood filler works for holes and gouges, press it firmly into gaps, overfill slightly, then sand flush once dry. For veneer chips or deep scratches, take your time matching the surrounding surface level.
Stripping old finish is only essential when you’re working with badly damaged or incompatible coatings. Chemical strippers require serious ventilation and patience, but they reveal the beautiful bones beneath layers of questionable choices.
Prime everything. Quality primer blocks stains, seals porous wood, and creates the perfect canvas for your color vision. Two thin coats beat one thick application every time, preventing drips that scream homemade rather than handcrafted.
Step 4: Apply Your Creative Vision
Now comes the magic, transforming that prepped piece into something that makes people stop scrolling and reach for their wallets. This is where your fashion sense becomes your superpower.
Choose a finish that matches your vision. Paint offers endless color possibilities and works beautifully on most surfaces. Water-based options dry quickly and emit fewer fumes, while chalk paint creates that coveted matte, vintage look without priming. Stain enhances natural wood grain, perfect when you want to highlight beautiful details rather than cover them. Try layering stains or mixing them for custom tones you won’t find in stores.
Don’t play it safe with color. That jewel-toned emerald dresser or blush velvet chair will sell faster than another white farmhouse piece. Look at current fashion palettes for inspiration, if burnt orange and sage green are trending in clothing, they’ll resonate in home décor too. Color blocking, ombré effects, and contrasting drawer fronts add visual interest that photographs incredibly well.
Hardware makes a statement. Swap basic knobs for brass pulls, leather straps, or geometric handles that reflect your brand aesthetic. Even a $50 dresser feels luxury with the right hardware upgrade.
For upholstered pieces, reupholstery doesn’t require expert skills for simple seats and cushions. Choose durable fabrics in bold patterns or rich textures. A staple gun and YouTube tutorial can take you surprisingly far.
Apply finishes in thin, even coats. Multiple light layers always beat one thick, drippy application.
Step 5: Add Finishing Touches and Protect Your Work
Your piece is painted, stained, or refinished, now comes the part that separates amateur work from pieces customers will pay premium prices for. The right protective finish extends durability and adds depth to your creative vision.
For painted furniture, apply two to three thin coats of clear polyurethane (water-based for easy cleanup, oil-based for richer depth) or furniture wax for a softer, vintage look. Let each coat dry completely before adding the next. Stained wood benefits from spar urethane or Danish oil to enhance grain patterns while guarding against daily wear.
This is where your fashion-forward eye truly shines. Swap dated brass pulls for matte black handles, or add geometric knobs that echo current design trends. Consider fabric drawer liners in bold prints, gold leaf accents on drawer edges, or stenciled patterns that make your piece Instagram-worthy.
Run your hands across every surface checking for rough spots, drips, or missed areas. Open and close drawers multiple times. Tighten any loose hardware. Your signature style deserves flawless execution.
Step 6: Document and Market Your Creation
Your finished piece deserves to be seen in its best light, literally. Start with photography that does your work justice: shoot in natural daylight near a window, declutter the background completely, and take multiple angles including close-ups of your signature details. Your phone camera works perfectly if you wipe the lens and hold it steady. Style the piece with a throw pillow or plant to show scale and personality, but keep the focus on your transformation.
Pricing requires confidence. Calculate your material costs, add your time at a fair hourly rate (don’t undersell yourself), then research what similar pieces fetch in your area. Most upcyclers aim for 3-4 times their material investment. Factor in the uniqueness of your aesthetic, bold, trend-aware pieces command premium pricing.
Sell where your customers already browse. Facebook Marketplace and Instagram reach local buyers quickly. Etsy works for shipping smaller pieces nationwide. Consignment shops handle foot traffic while you create. Local markets let customers see your craftsmanship up close and hear your story. Start with two platforms, master them, then expand. Post consistently, use relevant hashtags, and let your distinctive style become recognizable. Your brand aesthetic, the colors, patterns, and vibe that make your work unmistakably yours, is what turns browsers into repeat customers.
How to Know Your Piece Is Market-Ready and What Comes Next
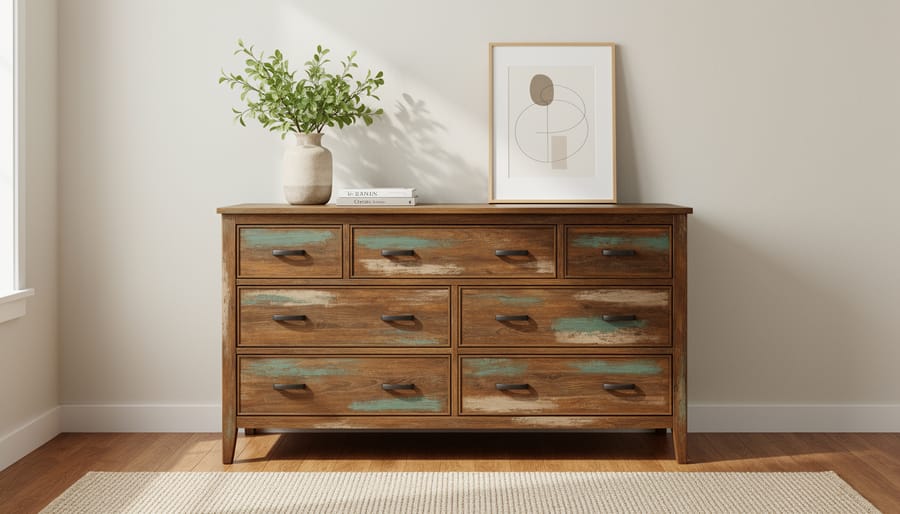
Before you list your piece for sale, run it through a quality verification process that protects your reputation and builds buyer trust. Start with structural stability, sit on chairs, open and close drawers multiple times, test hinges and legs for wobbles. If it doesn’t feel solid to you, it won’t to a customer either.
Examine your finish up close under natural light. Run your hand across painted surfaces to catch rough spots, drips, or uneven coverage. Check corners and crevices where amateur work shows, these details separate a piece someone cherishes from one they regret buying. Your finish should feel smooth and look consistent from every angle.
- All drawers slide smoothly without sticking or gaps
- Doors close flush and latches catch properly
- Paint or stain shows no drips, bare spots, or brush marks
- Hardware is secure and functions without looseness
- Upholstery sits taut with clean, even seams
- No chemical smell remains from paints or strippers
- Piece photographs well from multiple angles
Test every functional element, if it has doors, open them twenty times. Drawers should glide, not scrape. New hardware must sit flush and tight. Take photos in good lighting because if a flaw shows in pictures, buyers will notice. Clean the piece one final time, including underside and back edges that customers absolutely will check.
Once your piece passes inspection, you’re ready to scale. Build your portfolio by photographing each creation with consistent lighting and backgrounds that reflect your brand aesthetic. Document your process through before-and-after shots that tell a transformation story, this content fuels your social media and connects you to the broader repair and upcycling movement reshaping how conscious consumers approach home décor.
Connect with local upcycling communities through workshops, maker spaces, and sustainability events where you’ll find collaborators and customers. Position yourself at the intersection of fashion and home by emphasizing how your pieces allow people to express personal style beyond their wardrobe. The same audience drawn to tech upcycling and supply chain transparency wants furniture that reflects their values. Start with consistent quality, then expand your range, raise your prices, and watch your creative side hustle grow into something real.
Building Your Upcycling Business Brand
Your brand is what transforms occasional furniture flips into a recognized business that customers seek out and return to. It’s the visual and emotional thread that connects all your pieces, telling a story that resonates with buyers who want their homes to reflect their values and personal style.
Start by defining your signature aesthetic. Maybe you’re drawn to bold jewel tones and brass hardware, or perhaps you love soft neutrals with organic textures. Look at the pieces you’ve already completed and identify what makes your work distinctively yours. This isn’t about limiting yourself to one color or technique, but about creating a recognizable point of view that fashion-conscious buyers can identify and connect with. Your aesthetic should feel like an extension of who you are, not a forced persona.
Social media becomes your gallery and your voice. Instagram and Pinterest work beautifully for furniture upcycling because they’re visual platforms where transformation stories shine. Show your process, not just polished final shots. A time-lapse of a dresser going from drab to stunning performs better than a static after photo because it demonstrates your skill and invites viewers into your creative journey. Share the backstory of each piece, where you found it, what inspired your vision, the challenges you solved along the way. This storytelling builds emotional investment and positions you as both artist and entrepreneur.
Connect your work explicitly to sustainability and empowerment themes. Today’s buyers, especially women who follow fashion and design trends, want to support businesses aligned with their values. Explain how each piece diverts furniture from landfills, preserves craftsmanship, and offers an alternative to mass-produced options. Frame your business as part of the larger repair and upcycling movement that’s reshaping how we consume and express ourselves through our spaces.
Consistency matters more than perfection. Use the same filters, similar photo compositions, and a steady posting rhythm so your feed feels cohesive and professional, building trust with potential customers who want quality and reliability alongside creativity.
You’ve got the creativity, the eye for style, and now the knowledge to turn vintage furniture into statement pieces that people will love. Starting your upcycling business isn’t about having a massive workshop or years of woodworking experience. It’s about taking that first piece, trusting your vision, and learning as you create. Every furniture transformation you complete adds to your skills, your portfolio, and your confidence as an entrepreneur.
Your upcycling business puts you at the heart of a movement that’s changing how we think about consumption and style. You’re not just selling furniture, you’re offering pieces with personality, sustainability, and a story that mass-produced items can never match. The customers who find you are looking for exactly what you create: unique home décor that reflects their values and their aesthetic.
Do I need woodworking experience to start an upcycling business?
No formal experience is required. Many successful upcyclers start as complete beginners and learn through practice, online tutorials, and experimentation with their first few pieces.
How much money do I need to start?
You can start with $200-$500 for basic tools and supplies. Begin with free or low-cost furniture finds to minimize risk while you build your skills.
Where will I find customers for my upcycled furniture?
Start with online marketplaces like Facebook Marketplace and Instagram, where you can reach local buyers. As you grow, consider craft fairs, consignment shops, and building your own website.
How long does it take to see profits?
Many upcyclers make their first sale within weeks of starting. Consistent profitability typically develops over 3-6 months as you refine your process and build a customer base.
Start with one piece. Give it your best effort, celebrate what you learn, and put it out into the world. Your furniture upcycling business begins the moment you decide to create something beautiful from something forgotten, and that moment can be today.
You may also like
-
What Is Fashion Journalism (and How Does It Shape the Industry)?
-
What Is Innovation in the Beauty Industry (and How Is Technology Changing It)?
-
Your Digital Footprint: What It Is, How to Manage It, and Where to Get Support
-
What Is Native American Textile Art (and How Indigenous Techniques Are Being Revived)?
-
What Is This Renewable Resource Made from Rotting Plant Material? (And How It’s Transforming Fashion)